Monday, October 19, 2020

Budgeting Beysics

Hey Bladers! I haven't been making posts here in a while due to being busy outside of the blog. I'm still going to continue with this and see where it goes, as I liked presenting ideas and receiving feedback from those who read. However, it looks like Burst is nearing its end with Sparking though we are not sure if that's truly the case yet. Once Burst ends, I do intend to continue the blog if I have ideas for it, and I might even switch up topics to maybe cover older beyblade incarnations or shift to another product, but I'll inform you if/when it comes to that. Additionally, as we are well into Beyblade Burst Sparking, I will be going through some of my older posts and making updates as I see necessary, so feel free to take a look and leave a comment if you want me to cover anything or respond directly to a question you may have related to the post. Once again, thanks to those that continue to provide their support and I hope you continue to enjoy my blog. 


       One of the reasons I find beyblade enjoyable is due to it being accessible for almost any price range. Collectors can invest in the long term and build their way up from starters to rare editions of their beys and have multiple copies for playing with some and showcasing others. More competitive players can find forums and secondary markets to find the best molds possible, and can also invest in multiple copies to test these molds on their own. While there are ways to dive into the market for players with the money to spend, beyblade is fairly cheap to get into and invest in the long term. 


Seriously though, most anime bladers have mastered the art of the budget


What is Budgeting?

In the simplest terms, budgeting means that you have set aside a specific amount of money to spend for a specific expense. Budgeting is a necessity for most people since you want to get the most value for whatever you choose to invest in and make sure that you have money for other needs or wants you may have. I would personally define that value as getting the most enjoyment out of the game as possible with the budget you have given yourself. In broader terms, however, I'm going to give the average monetary budget a range starting from roughly 50-100$ USD, which you can convert into your respective currency. This is roughly the amount I would say is needed to get into the game from scratch, buying either two beyblades to battle with, two launchers, and a beystadium, or a starter set that comes with all the items previously stated. 


        Just because you operate on a budget doesn't mean you are locked out of playing competitively either. More recent sets include a higher quality of parts that make it very easy to assemble competitive combos on a budget, and the secondary market also tends to have most beys in stock at reasonable prices aside from rare or limited items.


        After that, if you want to further invest in the game it would be around 10-20$ for each bey or part you want, saving more for buying certain sets.  For casual play, you can also choose to just stay with the basics if you're on the fence about investing further into the game, or get extra beys as you like so long as it's within the budget you've given yourself. Your budget can also vary beyond this for several reasons which are completely fine. I'm giving this estimate from my experience with the game, and the advice I'll give is still applicable beyond this range so use it to your discretion.

Tip #1: Generally avoid beys that rely on being kept in a certain condition/Keeping your parts in good condition

For budget purposes, you would want to avoid having to re-buy certain beys or parts that have worn down beyond an optimal or usable condition. Therefore, getting beys that don't need to be kept in mint condition or have to get to a certain stage of wear for optimal use lets you save money in the long runs since you'll be able to focus more on expanding the collection with new parts over repeats more often. This one generally applies to parts that use rubber since it wears down faster than any other material, but it also applies to parts made of POM since it will wear down as well. Concerning types, that would take out a lot of attack options since most use rubber tips to cover the stadium quickly. However more recent rubber molds are made of a harder material that doesn't wear out as quickly, so it's possible to keep it for longer if you maintain it well. 

    To save on money you can minimize how often you use those parts so that you can keep using them over a longer period of time. That also applies to any part in general since it's when you use the bey that it will begin to wear down. Keeping your parts separate when you aren't using them also helps them last longer, and organizing them in a container will help you have a spot to use outside of your stadium maintaining its condition as well. 


Tip #2: Focus around beys that will improve your existing collection

While there are a variety of parts to consider for testing and making interesting combos, on a budget you're probably not going to be able to try anything and everything, and thus whenever you want to add to your collection, it's important to consider what will either make what you already have better or make up for weaknesses your current collection has. Firstly, this doesn't mean you can't choose something you genuinely want even if it doesn't synergize with what you already own. If you like something then, by all means, go for it, it's your money after all and therefore you have the final say. 

    But as an example, 
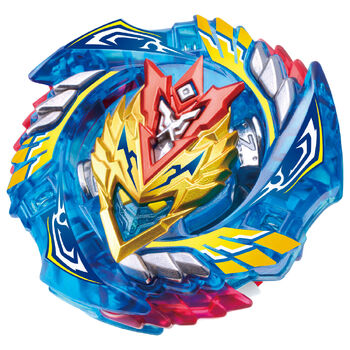
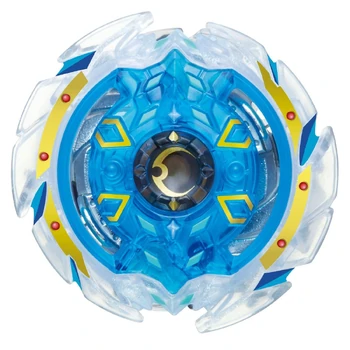
let's say that you're starting with Brave Valkyrie and Rage Longinus and that you want to add some more 
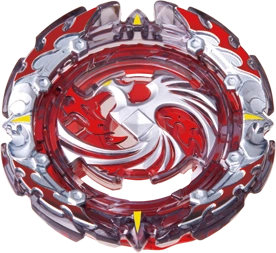
beys after losing to a friend who was able to make Perfect Phoenix from both Revive and Dead Phoenix. Since it was a defense type that beat your attack types, one option is to consider purchasing a stamina type as an attempt to directly counter the combo or use heavier parts to 
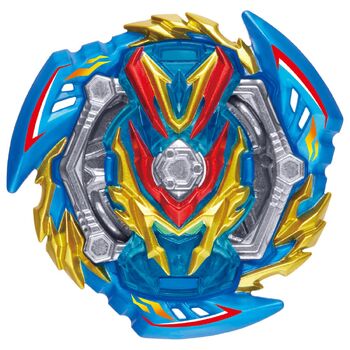
increase the impact of your attack types. Obtaining Glide Ragnaruk would allow you to experiment with both options since the wheel disk is the heaviest in the game which you can use with 1S on either of the beys you already own, while with Revolve you can test stamina based combos as well. Thinking critically about what you purchase based on what you already have can help you make decisions that will satisfy you in the long run, while also ensuring that you develop a good pool of parts that will let you build more successful combos. 


Tip #3: Outline reasonable goals for yourself and your collection

One of the most important things for developing any hobby is to find motivation for it beyond your initial interest. To that end and for the sake of a budget, having a set of goals you want to accomplish can go a long way to finding more enjoyment with what you currently have to avoid the temptation of going outside your budget to constantly look for something new. These goals should also be manageable for yourself and your current collection so that you will have a more positive outlook towards accomplishing these goals, and reflecting on what you have learned to do since you started investing in the game.

       Goals for yourself would be things like developing techniques and figuring out customization options with your current collection and don't require anything beyond what you have currently to apply what you've learned, and you can apply these goals in the long term based on however you build your collection from there. Goals for your collection would again be something like identifying shortcomings in your collection, or for fun trying to collect based on a theme like color or materials. This goes a long way not just for beyblade, but any hobby you choose to get into. Setting these goals either in a list or as milestones as you start getting into the hobby can help make it more enjoyable as it lets you more clearly track your progress in the game. 


Budgeting is quite fun and rewarding once you figure out how to go about it since you're simultaneously finding a way to do the things you enjoy and also manage your money to do other things as well. Whether it's going to be a long term plan to stay invested in a hobby at a reasonable price, or a stepping stone until you've earned enough to spend more liberally, learning how to operate on a budget is a good skill to pick up at some point, and with these tips and other ideas you may have or may encounter, I hope you'll be able to enjoy the game at whatever price range fancies you.


Just remember to have a good time doing it


Thursday, April 9, 2020

Recoil


beyblade burst god free Launching GIF
It's not like this irl but it does feel like it sometimes


Due to the nature of the game, there are various aspects of physics that one can use to their advantage when playing, and while I've mentioned some of these concepts in past articles, I haven't gone over any in full. So I'll be doing some of that to help things make more sense as I cover and expand on other topics, starting with the one for today, recoil.


What is Recoil?

Starting off with the definition, recoil is a backward movement caused by the force of impact. In terms of beyblade, this refers to the backward movement from colliding with an opponent's bey or from hitting the stadium wall. While one can't control how every clash plays out, they can make adjustments and choices to adjust it in their favor more often.

The most direct way to adjust recoil for your bey is by figuring out what type of contact you want it to have by selecting a layer that fits your needs. Generally, the closer the layer is to being a circle, the less recoil it will have, and the further away you move from this and give the bey defined edges, the more recoil it will have.

Rounder layers, like Dread, have less recoil because when it takes a hit, the force of the impact is dispersed more evenly across the beyblade as there aren't as many weak spots where a hit will more severely knock back the bey, so they're used more often in defensive or stamina based combos, while beys that have more prominent edges like Venom are used in attack based combos since they want to force the impact onto their opponents, going on the offensive to avoid the risk of getting hit themselves. Some layers use different materials which also affect recoil either by adjusting the weight and how it's distributed or by adjusting friction to make it harder or easier to apply/receive recoil. These two factors can actually be applied to the bey as a whole, so I'll explain how each one affects recoil in general.

Friction in relation to Recoil

You have not known true fear until you've unexpectedly faced someone with a fresh Judgement base


Friction is the resistance to motion of one object moving relative to another. For beyblade, this refers to how much or how little a bey will move against the stadium and also against a bey it collides with.

If your bey has less friction against the stadium, it can move and spin more freely at the cost of also taking the risk of getting knocked out easily. Bearing on top of it's namesake having ball bearings, also has a free-spinning tip made of POM that has less friction against the stadium to maximize spin time, making it an excellent tip for stamina types, though it's easier to knockout combos that use the driver due to the reduced friction. This also doesn't mean that beys which have more grip against the floor can't move as much either. Flat rubber tips for drivers like Xtreme are used more commonly for attack types since the wide surface area of a flat tip, along with the added grip from the rubber allows them to more violently push against the stadium to build up speed, while also preventing them from getting knocked back from the force of their attacks. Rubber can also be used defensively, such as the Keep driver, so that the bey is not knocked back as far, if at all when taking a hit from an opponent.

Rubber can also be used on layers for offensive or defensive applications of recoil as well. Judgement is an example of offensive use where it's designed to generate a lot of recoil from the impact of the ridge's shape along with the grip preventing the energy of the impact from being overly dispersed. Defensive applications of rubber are used for layers like Poison to cushion the impact of attacks, or for spin equalization such as Wizard, where the grip of the rubber helps to take the momentum from the opponent, converting more of the energy from the impact into spin power instead of simply dealing with the results of recoil. In addition to friction, weight and weight distribution can also be used to adjust recoil.

Weight and Weight Distribution in relation to Recoil

Just because something is the heaviest does not mean it's the best


Weight refers to how heavy the overall beyblade is, while weight distribution is how the weight is balanced across the bey as it spins. Both apply to recoil as the heavier your bey is, the harder it is for it to move and be moved across the stadium, while weight distribution affects how your bey deals  and recovers from blows. However, some combos will utilize parts that are lighter as they favor reduced friction at the cost of being knock-out prone, such as stamina-based combos. The difference in weight among the individual parts of a combo will also affect burst resistance, so using parts that are lighter can help to improve it as well. Metal sections are a common way to increase the weight of various parts, such as the metal dragon heads on Zwei which are used to apply more force against the opponent's bey. Having a heavier layer can also improve burst resistance. If your disc and driver setup is heavier than the layer and there's no additional features in the combo to aid with burst resistance, the disc/driver combo is more likely to have momentum separate from the layer as it collides with the opponent's bey, making it easier to burst. If the layer setup is lighter than the disc and driver, this effect can be somewhat reduced. 

Discs being the main metal section of the bey will generally have the largest effect on both weight and weight distribution. Currently, the most popular discs fall in the heavier section, such as the recent GT disks like Blitz and Sting, or core discs like 10, 0, and 00. This makes sense as beyblades become heavier in general as they're improved upon, but lighter disks are also still used for the reasons I covered earlier as well. Disc frames are also used to add extra weight as necessary. The stars under the discs also cause minor adjustments to weight distribution, so depending on that along with how you place it in your bey, you can affect the overall balance of your combo. Try placing the disc in a different configuration if you find that's it's not spinning as smoothly as you want it to. By balancing the weight among your parts and adjusting it for even weight distribution as it spins, you can have a more well rounded combo that can handle recoil better, or more specifically have it handled the way you want it to more often.
Buster Xcalibur 1' Sword | Beyblade Wiki | Fandom
Xcalibur is actually pretty cool layerwise for emphasizing this concept


Recoil is a very important factor to consider when making your combos as this is a game where you'll be having two or more tops clash against each other. Making the most of how it's applied and using that knowledge to your advantage can help to improve your customization skills, and put you ahead of others when it comes to battling. 


Saturday, January 11, 2020

Burst Layer Systems


Welcome to not just a new year, but a new decade...
Image result for new years gif"
Looking forward to what the new year will bring

It's kind of crazy to me that 2019 is already over and that a decade has also ended with it. Seeing as I'm feeling a bit nostalgic, so let's take a look through each of the different systems applied to Beyblade Burst. Like the previous series, Beyblade Burst starts off by featuring the new mechanics of the overall series that they wish to showcase, before making the system more in-depth through new gimmicks that allow more options for customizing beys and figuring out how to use them in battle.

For Burst, each system is named in regards to how the layer has changed over the course of the series' run, though other parts may have had minor changes or new features as well that we'll also go over in lesser detail. 

One thing to note is that Hasbro's system operates differently than Takara Tomy as there are some changes between both groups. Mainly, Hasbro's locking system doesn't use teeth on the layer, instead using slopes that are less tight. I'll also briefly cover the Slingshock and Hypersphere systems when I go over Cho-Z and GT respectively. 


Let's begin by taking a look at the Single Layer System.


                                                                 Single Layer System
Valkyrie Wing Accel

The single layer system is the most simple in design, having only three parts to work with being the Layer, Disc, and Driver. While none of the layers in burst are simplistic with various shapes and protrusions, the single layers are the most basic as it is just one piece with no actual gimmick other than how the ridges affect spin duration, balance, and recoil when making contact with other beys. 

The discs all had different names that either directly refer to their design or refer to the gimmick the disc is theoretically supposed to apply. Drivers are named in a similar fashion as discs, but their gimmicks were more prominently featured and worked more often than the ones discs had.


Dual Layer System

Image 1
Victory Valkyrie Boost Variable


The Dual Layer system expanded on what the single layer left behind by making the layers thicker as they were split into two, the clearer section being one layer set upon the more colored one. The designs were better developed, but there was still a lack of notable gimmicks. Discs and Drivers were designed in the same fashion as the single layer system, but the drivers did have more defined gimmicks, such as variable's evolution function where the driver gets faster as you use it and the rubber spikes wear down. 


God Layer System
Official Image
God Valkyie 6 Vortex Reboot

The God Layer system, also labelled as the Switchstrike system under Hasbro is where we see the systems truly differentiate from each other. The main feature of the God Layers is that they have actual gimmicks aside from just the layer's design. Though not all work as intended the changes that came from this made the battles more dynamic than the previous layer system. Each layer could also be adjusted by either changing the God Chips which rest in the center of the bey (though standard ones are mainly aesthetic with no real change to overall performance), or they could be replaced with Metal God Chips which added weight.


Discs also changed as they started to be labelled with numbers referring to how many protrusions come out, and the numbered disks could be further customized by adding a Disc Frame which affected weight distribution and spin time among other factors. Drivers continued to improve with new gimmicks, or ones that mimicked gimmicks found in older series, such as how Ultimate Reboot or Zeta reflect Final Drive and Delta Drive from Metal Fight respectively.


Cho-Z System

Official Image
Cho-Z Valkyrie Zenith Evolution

The Cho-Z (Chō-Zetsu or Super Z in english) Layer system further changed the game as the layers featured die-cast metal sections for increased weight, which resulted harder hits as beys battle. They also continued to implement gimmicks like the God System, though Cho-Z beys that were released early on did not feature them. Most layers had 3 slots that cause the bey to be unbalanced, which could be fixed with the use of a level chip that fits under the layer into said slots, though it was also harder to obtain early on due to only being available through special releases or events. 

There was also subsection of layers that featured the "Cho-Z Awakening System" where if the bey is launched hard enough, protrusions called the "Cho-Z Wings" will extend outward, also releasing a set of points inside the bey that prevent it from unlocking to the point of bursting, referred to as "Burst Stoppers." These layers were incompatible with level chips as the bottom of the layer was covered to hold the components of the awakening system.

The discs were still generally numbered and compatible with frames, and there were also new frames and discs developed that worked with ones from the previous systems. The drivers also continued to develop, and "Dash Drivers" (marked by an apostrophe, such as Destroy') came into play. These drivers were generally releases of older drivers with a stronger spring to add to burst resistance, and were marked with a red ring on top instead of the normal white one. 


Hasbro's release of Cho-Z, the Slingshock system, diverges the most from its Japanese counterpart in comparison to its take on the other systems. First, there was a lack of metal used in most of the layer releases, as the metal (and rubber in some cases), was replaced with plastic, making it less impactful compared to Cho-Z line and also came at the cost of the main gimmicks of some beys. 

Secondly there was more of a focus on designing the beys to be specifically used with Slingshock Beystadiums, which featured rails a bey could ride along for a direct attack on opponents in the center of the main battle area. This was done by giving the drivers the ability to switch into "Slingshock Mode" which was essentially a flat tip designed for aggression for more chances to ride the rails. Some beys did come in the Switchstike line where they kept their original gimmicks, but these still mainly used plastic which lowered the effectiveness compared to Takara Tomy products.


GT Layer System
Image 1
Slash Valkyrie Blitz Power Retsu

Next is the GT (Gatinko or Serious in english) Layer system, which adds more to amount of customizable parts currently among the burst line. The layer is now divided into three parts:

The GT Chip: Has teeth used to lock the bey together. Different chips have different teeth. 


The Layer Weight: Another metal (or rubber in the case of Gen) part that adds more weight to the bey in addition to the disc.

The Layer Base: The main part of the layer that makes contact with the opponent's bey. Has tabs to hold the other layer parts together, and different layers also have different heights that the GT chip rests upon, affecting the tightness of the lock.

This drastically increases how much one can change up their bey as each part changes a various aspect of performance from burst resistance to weight distribution at a greater level. 


Another subsystem has also been released, the "Mugen (Infinite) Lock System." This keeps the layer as a singular piece but now the bey can click infinitely without bursting through normal conditions. The only way to burst this kind of bey is by first getting it to rotate so that the center shows red and then hitting a tab that causes the final click to happen, resulting in a burst.

At this point previous discs and frames have been re-released, but GT has also released new discs that are named and designed similarly to those from the single and dual layer era with plastic mimicking the use of disk frames that can have various gimmicks, however they are more developed with increased weight and additional features to stand out among the other generations.

Drivers have continued to develop with new designs, as well as older drivers being made more relevant with Dash Versions. GT has also given us two electric drivers, Hybrid and Ignition' that change performance mid-battle depending on your launch power.

Hasbro's release of the GT system is labelled as Hypersphere. Like their Slingshock lineup, Hypersphere layers continue to use plastic as the main component with little to no metal, as the layer weights are fused with the base and are made of plastic painted to look like metal. The GT chips are still customizable, but with the use of slopes there isn't much of a change to performance.

The GT discs have also been used, but changed by removing the plastic sections leaving only the metal portion of the disc, reducing weight and adjusting performance in the process. This was done because of the hypersphere mechanic, which in similar fashion to slingshock, means that the system is designed to be used with a specific stadium, being the Hypersphere Stadium that has a deeper bowl design for the main play area with ridges that beys with more mobility can reach. The tips have also been changed to suit this with what I'd call a "weeble-esque" design that is rounded to suit the stadium.

Superking (Sparking) Layer System 

Brave Valkyrie Evolution' 2A

SuperKing, which can be read as Sparking, is the current system following GT in beyblade, breaking up the layer once again, but now in such a way that it includes the disc. The layer is now broken up into four parts:

Chip: Similar to the GT chip in that it has the main "face" of the beyblade. Different chips are weighted differently and occasionally have gimmicks like the inclusion of metal.

Chip Core: Small piece that attaches in the center of the chip. Provides slight differences in weight and and may have slopes at different heights which affect the tightness of the bey.

Ring: Main contact point of the bey similar to the layer base of GT and holds the other parts of the layer together.

Chassis: The main metallic portion of Sparking beys that also has teeth that the driver locks on to like those in previous layers and on the GT chip. There are two types of Chassis, single chassis which are lighter and can have a regular disc attached to complete the bey, and dual chassis which also take the role of the disc and thus don't need one when putting a bey together. 

The inclusion of Chassis allows one to mix up their options a bit more, but is not as backwards compatible as other incarnations since all Sparking beys require a chassis to operate, and Chassis can't be attached to previous layer systems. However, discs and drivers from sparking work as normal and are generally interchangeable with all incarnations. The term sparking also refers to the new Sparking Launcher, a beylauncher with a stronger string with material that rubs against a guard inside of the launcher when pulled, generating cold sparks. 

Here are links for parts under each generation:

Single and Dual: 
https://beyblade.fandom.com/wiki/List_of_Burst_System_parts

God: https://beyblade.fandom.com/wiki/List_of_God_Layer_System_parts

Cho-Z: https://beyblade.fandom.com/wiki/List_of_Cho-Z_Layer_System_parts

GT: https://beyblade.fandom.com/wiki/List_of_Gatinko_Layer_System_parts

Sparking: https://beyblade.fandom.com/wiki/List_of_Superking_Layer_System_parts


Overall, the Burst line is very interesting to look at in comparison to older series because it's able to build off of what previous series have done, while also playing around its main mechanic and using it to go beyond what has been done in the past as well (I don't mean that the older series are worse by any means, but I do like Burst the most at the time of writing this).

They managed to expand upon what they started with to the point where it feels not just like each part is important to how a bey performs overall, but that each part you choose to customize actually changes how the bey will perform as well, and there's no one aspect that seems less significant than another. I've really enjoyed playing around with it and can't wait to see what they do with it next. 

Monday, November 18, 2019

Launch Techniques


Even with some inaccuracies in the show, I appreciate the time put in to display two fundamental aspects...

Beyblade Beyblade Burst GIF - Beyblade BeybladeBurst GIFs
Power and Style

Launch techniques are another fundamental aspect of the game, though it's normally overlooked by casual players or spectators. To further add to the game's versatility, you need to decide and use a launch that works best either for your bey and/or for dealing with your opponent. Being the other factor you can directly control during a battle, one should put in some time to understand how each launch technique works, and how to perform them yourselves when the time comes. 

So with that, let's start breaking them down, shall we? Before we start, please note that the techniques I'll describe here are generally for standard stadiums, and they may not be able to work in stadiums with gimmick designs. Additionally, when I mention holding a launcher, holding a grip attached to the launcher is an interchangeable term as well.


- Standard Launch

This is the go-to launch when starting off and learning how to play the game. Generally, the hand that holds the launcher is held over the stadium at an angle parallel to the center of the stadium floor and doesn't move from its position as the cord is pulled. This causes the bey to drop to the center of the stadium before going into the general movement pattern caused by the tip. You can change up the launch by pulling harder or more softly to increase/decrease spin power respectively. 

Increasing power will give the bey more stamina and movement while decreasing power can soften the impact of attacks and restrict movement, which also reduces the chance that your bey bursts. While it's a solid launch, your bey is somewhat open to attacks as a result of being in the center, so you can mix it up by aiming for different spots in the stadium. In general, this launch is recommended for beys that have limited movement, such as defense and stamina types, to maximize endurance.


- Banking Launch

The banking launch works like the standard launch with a catch. You still have a stable grip on your launcher as you pull the cord, but you now "bank" the launch by holding it at an angle where the bey is parallel to the slope of the stadium instead of its center. 

Since the performance tip now lines up with the stadium slope your bey will have a wider range of movement around the stadium before it becomes upright or loses enough spin to return to its standard movement. While this launch can be used for beys with stable performance tips to dodge or initiate some attacks on their own, this launch greatly benefits beys with more movement such as attack types, as the movement allows for attacks to better target the center instead of just riding around the outside of the stadium. 

You can also use it on other types in an attempt to avoid attack patterns. The wider movements do take some stamina away as a result, but altering the initial movement pattern of your bey can aid in using the remaining stamina to maximize the other aspects of your bey. In addition to practicing banking, I'd suggest trying out other angles to see what else may work for your beys.


- Catapult Launch

This launch starts in the same position as the standard launch, but as the name suggests, the bey is "catapulted" into the stadium by pushing  the launcher forward at the same time as you pull the cord back when launching.  This generates more power than the standard launch to further increase stamina, and the force can also allow for a strong opening attack. However, it's difficult to use initially as the power comes at the cost of some control and accuracy. If launching straight out be careful so that you don't hit your opponent or another object. 

This launch benefits any bey as the stamina is increased, but the greater amount of rotations can leave it vulnerable to recoil, and beys with more mobile tips may have a harder time remaining in the stadium. Since it may also divert from the normal movement pattern due to inertia from the launch, consider using it with tips that have smaller ranges of movement for more control. Practice keeping the launch within the stadium without a bey attached at first, and also have an idea in mind of where you want your bey to land in the stadium to adjust before you launch.


-Sliding/Rush Launch

This launch combines utilizes both aspects of banking and catapulting into one launch technique, which is popular among competitive players and has gained more notice due to it being featured in the Beyblade Burst anime series. To start, have your launcher held in a banking position parallel to and targeted at the stadium slope. Then, launch from that position via catapulting your bey

This results in the movement shifting at the start to continuously move to and from the center in a flower pattern (as the small circular movements resemble the petals around a flower's pistil) for mobile beys. Because of that, this technique is recommended for beys with more movement, especially attack types as you get the extra power from catapulting, with less stamina wasted since banking the launch lets you get more attacks on the center initially. To practice the launch I'd suggest starting with catapulting practice to get your launch under control, and then adding banking to work on developing the desired effect.


-Bank Down Launch

This is a variant of the sliding/rush launch where your launcher is angled further down from the normal banking angle, where it's a bit closer to being launched vertically against the stadium. Like the previous launch, this is done while catapulting and has nearly the same results as a sliding/rush launch. By angling the launcher further down it's easier to perform than the previous technique since the angle is tilted further decreasing the chance of correcting the launch to be parallel to the center of the stadium. 

However the impact of the launch from catapulting takes the endurance benefit that's normally granted as a result, making the technique weaker than the sliding/rush launch. It also leaves some tips prone to breaking from the impact as well, so I wouldn't recommend using it aside from as practice to ease into learning the sliding/rush launch.


- Flash Launch

This launch is like the bank down launch without catapulting. By setting your launcher at an angle past the regular one for banking, the launch sends your bey to the center and then has it perform its regular movement pattern. This is also recommended mainly for attack types, specifically in attack vs attack battles as your bey will be in the center and then catch the opponent spinning around the ridge of the stadium, giving you an opportunity for an over or burst finish.


- Snipe Launch

This launch doesn't focus directly on any traits of the previous techniques, but rather requires timing. First, you have to guess or figure out where your opponent is aiming for their bey. Then, within the allowed time of launching you delay your own launch slightly aiming at that spot to hit their bey with your own either in mid-air or just as they hit the stadium. 

The direct attack can give you an edge or decide the match when performed correctly. It's recommended to use the catapult technique with this launch for the extra power. Since this technique doesn't necessarily rely on specific traits or parts from your bey, you can use it with any type, but you should consider your own bey's burst resistance and points of recoil against theirs as well.


- Conclusion

Overall, there are various techniques that you can use to give yourself an edge in the game, and it's up to you to figure out what you should do to make the most of them in conjunction with your bey.

I also recommend checking out this video that provides some visuals and another explanation for each launch: https://www.youtube.com/watch?v=TCrDJFh1ivM&t

Some things you can consider when deciding on a launch:

How likely is it for my bey to burst in this battle?
What type am I up against?

Where will my opponent aim?
How will my opponent's bey move?
What will my opponent's bey do to win?

Also take note that in a match with multiple rounds, you might not be able to rely on the same launch in each round as you and your opponent use info from previous rounds to decide what to do in the current one. It may be possible to take some wins with one solid launch, but it's better to be well versed in various launches to prepare for more situations. Hopefully, this guide gives you some insight to further improve your launches and adds another aspect to mess around within the game.


Image result for beyblade burst gif launch
Hopefully people don't injure themselves trying this IRL...
                                                            

Monday, November 4, 2019

Beyblade Types


Attack, Defense, Stamina and Balance...

Captain Planet GIF - Captain Planet GIFs
I am an organized type chart!
 
Now that I've gone through an overview to help you decide on a launcher, let's go over another fundamental part of the game, beyblade customization. One of the game's most appealing aspects is that bladers are able to mix and match parts to make many different kinds of beys for various purposes in battle.

 Given all of the options we have with parts, beyblades usually fall under four different classifications or "types" that describe general playstyles. For bladers of previous generations, the type system hasn't really changed from Metal Fight and the original series' toylines, though now the burst finish is another factor to consider when building your beys. 

Other various factors considered when deciding what type your bey is are things like weight, movement patterns, and spin time, though not every condition has to be met for their label. For now we'll take a look at the common traits each type has, their strengths and weaknesses and how they fare against other types, and also use stock examples that represent these various traits fairly well. Hopefully by the end of this you are able to better understand how each type works and can have a better idea of what to consider when customizing for and playing with each type.


Attack

Image 1

Let's start off with the most popular type, attack. This type is usually the most recognizable due to the dynamic movement inside the stadium. It's also used by almost every protagonist across the different incarnations of the anime series. The goal of an attack-type is to use great force to overpower opposing beys, hitting hard, fast, and consistently enough to end games with over/burst finishes.

The movement comes from using a performance tip with a flat base. This generates friction to move around the stadium, building momentum for their attacks. The layer will have various ridges/protrusions to control where/how force is applied when making contact, and the disk may also distribute weight to match the contact points on the layer. 

The overall weight is average or light when compared to other types, heavy enough to reduce the impact of recoil on itself while being light enough to reduce pressure on the driver to allow for more movement.

Victory Valkyrie/Valtryek V2 is one example of what attack-types can be like. It has various edges on the layer to direct how it's force is applied, the disk while light, is designed to push air downwards initially to have more force on impact (though in practice it's unable to do so), and the rubber driver adds on to friction for speed in exchange for a low spin-time, and gets faster with use since the spikes wear down and create a flatter and faster tip.

Attack-types have the lowest spin-times due to using a less stationary performance tip, while the uneven weight distribution also doesn't help keep the bey upright as it starts to slow down. This can be taken advantage of if the attack type fails to land hits on the opponent. Movement can also be hard to control with the driver making it vulnerable to over finishes as well. 


                                                                                                       Defense


On the opposite end of the spectrum, defense-types are intended to hold up against the best features of an attack-type, minimizing the damage taken from attacks while also being able to spin longer and wait for the opponent to wear down. One core aspect is that these beys are heavyweights, to have resistance against recoil.

The performance tips have moderate movement with ball shapes or wide cones, giving enough stamina to outlast attack-types while also enabling  movement for counterattacks or to dodge incoming attacks. The disk is designed to distribute weight more evenly and along with the layer, adds the most weight to the bey. The Layer is designed to be somewhat rounded to reduce recoil, but some ridges are included to enable counterattacks. 

An example of a good defense-type be would be Dead/Dread Phoenix 0 Atomic. The layer is much rounder compared to an attack-type and features a gimmick where the outer armor can fall of instead of having the beyblade burst from an initial hard impact, allowing the remaining bey to be even rounder while conserving stamina. 0 is a fairly heavy disc that distributes weight evenly to further help with defensive properties, and the Atomic driver is a free-spinning ball to aid with stamina while allowing for moderate movement.
                                                                                          
While it's designed to have more stamina than attack-types, defense-types don't have the most stamina as the weight puts pressure on the driver, and the components are not oriented to make the bey spin as long as possible. 

Stamina


Official Image
Since spin-time is an aspect fairly important to the game, it makes sense that there's an entire type dedicated to it. Stamina-types really only have one goal, spin for as long as possible and win the match with a spin finish.

The performance tip will have a pointed tip, either breaking into the wider cone or having a thinner design. This is done to minimize friction against the stadium by limiting how much contact is made while spinning and to decrease movement in order to conserve spin.

 The disc will distribute weight evenly, and alongside the layer will have average weight to further limit friction on the performance tip, but have enough weight to handle some recoil. The layers will also be very rounded or have a design intended to further extend spin-time. The parts may also work together to enable Life-After-Death (LAD), where the bey is able to generate extra rotations after it has lost stamina and fallen on its side.

Deep Chaos/Caynox C3 4 Flow Bearing serves as a good example. The layer's shape helps to maintain stamina and the sloped ridges provide minor defense, 4 is a lighter weight that reduces pressure/friction, and bearing's free rotating tip along with its use of ball bearings helps to greatly increase the spin time.

While they spin fairly long, since friction is minimized and the design has less defense/offense to extend spin time, they are prone to taking more damage from beys that can generate recoil. They also make easy targets since they generally stay in the center of the stadium where they will move the least. 
                                                                                                    BalanceOfficial Image


Following the main three types, Balance is unique in the sense that it's a combination of the types mentioned above. With a balance type, you use parts that combine traits from two or all three of the other types and use their synergies to create a jack-of-all-trades of sorts. 

Due to their nature it's hard to pinpoint specific aspects of what classifies them, since the parts you want to use depending on what types you want to borrow from. 

For attack traits, I recommend looking for layers that apply recoil, or drivers with a flat tip. For defense traits, heavier disks or layers that reduce the impact of recoil. For stamina traits, use more stable drivers or smooth and round layers to more evenly distribute weight.

Cho-Z Spriggan/Turbo Spryzen 0Wall Zeta' is able to use traits of all 3 types fairly well. The layer while corrugated is still rounded and has rubber to take hits and metal to dish out attacks. It can also alter between left and right rotation for further variation. 0 is a fairly heavy disc with the wall frame adding to the weight as well. Zeta' allows you to choose between a flat attack tip, a ball defense tip, and a sharp stamina tip to suit your matchups, while the stronger spring makes it harder to burst.

Using balance-types, one should be careful as the various traits implemented may not mesh well, resulting in a bey that is unable to do well in any aspect. While they are versatile, Balance-types are also masters of none, since having to use various traits means there's no one area it shines in. As such they are less likely to win against beys that take advantage of the types they've tried to implement, or beys that are clearly focused on one type. Overall, to use multiple traits the bey sacrifices the ability to be strong in one area, relying on its versatility to win.

Specialist


Image 1The last category I'll include is not officially recognized, but I think it's distinct enough to mention. Simply put, the specialist type is one used for beys that don't really fit within the other four categories. 

I think of it as the opposite of a balance type. While the balance-type wants to use various traits from the other three types, a Specialist goes against all other types in favor of focusing on one specific aspect that isn't labeled by the other three categories. While the balance-type is a jack-of-all-trades, specialists are one-trick-ponies.

 This can be a mechanic or gimmick that it chooses to build around and focus on for its strategy. However in a similar manner to balance types, the limit to building this kind of bey depends on what aspect you want to go for. It can include parts from the other types, but the main focus should be on what you want to specialize in. There's also a risk to building these beys since you may be lacking or forced to give up an aspect that's normally included by nature of being within the four more defined types.

Wizard Fafnir Ratchet Rise Sen is one example, where even though it's been officially labeled a stamina type, I feel it belongs in the specialist category. The wizard layer and ratchet disk use rubber and a plastic ring respectively, in order to absorb spin from right-spin beys, while the rise performance tip helps keep the bey upright to further enable spin stealing.

Due to their nature, specialists will be favored to win matches that they are designed to take advantage of, or that you've learned how to prepare for from experience. On the other hand they are also favored to lose match-ups that abuse their weaknesses, or where their weaknesses can be learned and taken advantage of. For example with Wizard Fafnir, the sen weight makes the bey somewhat unbalanced, and the ample amount of rubber used increases recoil and by extension, the chances for a self-caused over or burst finish as a result.

                                              
                                               ConclusionGiven all the types, a chart that organizes them looks something like this:          


Attack, Defense and Stamina are arranged in a fashion similar to rock, paper, scissors, considering their pros and cons. Balance is in the center and Specialist is outside the main four, fitting of their traits. A summary of each:

Attack: Uses high movement and recoil to win. Has advantage against Stamina-types since there's less resistance to their attacks, and the limited movement lets them set up easier. Disadvantaged against Defense-types due to the heavier weight, lower recoil, and moderate movement to avoid attacks.

Defense: Uses heavier weight and lower recoil to reduce the impact of attacks while maintaining some stamina. Has an advantage against Attack-types due to holding out against their attacks. Disadvantaged against Stamina-Types since their own stamina isn't maxed out.

- Stamina: Uses moderate weight alongside other parts to maximize spin times. Has an advantage against Defense-types since there's less of a chance to prevent an endurance battle. Disadvantaged against Attack-types since there's less resistance to an over or burst finish.

Balance: Uses parts to have traits from the aforementioned types in order to win through versatility. Advantage/Disadvantage depends on what traits are built upon, though it may also lose due to not being overly strong in one area.

Specialist: Uses parts to ignore strategies from other types and focus on a more specific/unique aspect of the game to win. Advantage/Disadvantage depends on how much the opposing bey plays into/against your specifications.

While there's still the possibility of some beys performing better than others, with how much one can customize there's no such thing as a perfect bey. It's up to you to find what combinations suit you and how to adapt your strategy to account for their weaknesses, or the opponent's strengths.