 |
| Looking forward to what the new year will bring |
It's kind of crazy to me that 2019 is already over and that a decade has also ended with it. Seeing as I'm feeling a bit nostalgic, so let's take a look through each of the different systems applied to Beyblade Burst. Like the previous series, Beyblade Burst starts off by featuring the new mechanics of the overall series that they wish to showcase, before making the system more in-depth through new gimmicks that allow more options for customizing beys and figuring out how to use them in battle.
For Burst, each system is named in regards to how the layer has changed over the course of the series' run, though other parts may have had minor changes or new features as well that we'll also go over in lesser detail.
One thing to note is that Hasbro's system operates differently than Takara Tomy as there are some changes between both groups. Mainly, Hasbro's locking system doesn't use teeth on the layer, instead using slopes that are less tight. I'll also briefly cover the Slingshock and Hypersphere systems when I go over Cho-Z and GT respectively.
Let's begin by taking a look at the Single Layer System.
Single Layer System
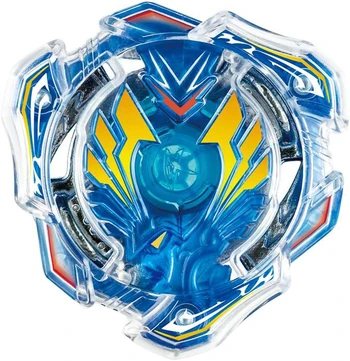 |
| Valkyrie Wing Accel |
The discs all had different names that either directly refer to their design or refer to the gimmick the disc is theoretically supposed to apply. Drivers are named in a similar fashion as discs, but their gimmicks were more prominently featured and worked more often than the ones discs had.
Dual Layer System
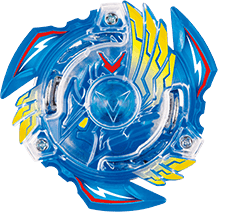 |
| Victory Valkyrie Boost Variable |
God Layer System
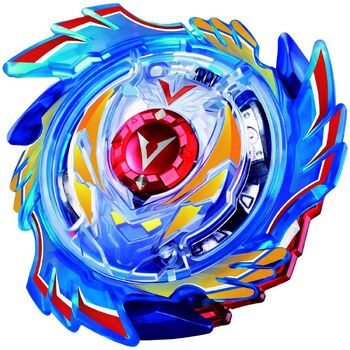 |
| God Valkyie 6 Vortex Reboot |
The God Layer system, also labelled as the Switchstrike system under Hasbro is where we see the systems truly differentiate from each other. The main feature of the God Layers is that they have actual gimmicks aside from just the layer's design. Though not all work as intended the changes that came from this made the battles more dynamic than the previous layer system. Each layer could also be adjusted by either changing the God Chips which rest in the center of the bey (though standard ones are mainly aesthetic with no real change to overall performance), or they could be replaced with Metal God Chips which added weight.
Discs also changed as they started to be labelled with numbers referring to how many protrusions come out, and the numbered disks could be further customized by adding a Disc Frame which affected weight distribution and spin time among other factors. Drivers continued to improve with new gimmicks, or ones that mimicked gimmicks found in older series, such as how Ultimate Reboot or Zeta reflect Final Drive and Delta Drive from Metal Fight respectively.
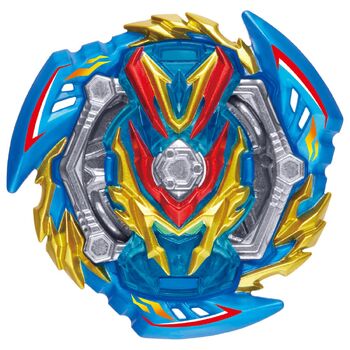
Cho-Z System
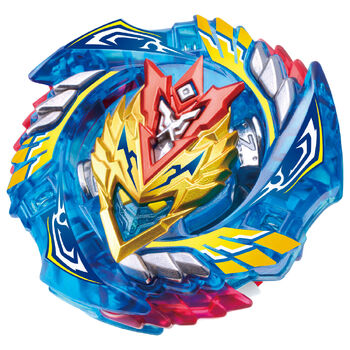 |
| Cho-Z Valkyrie Zenith Evolution |
The Cho-Z (Chō-Zetsu or Super Z in english) Layer system further changed the game as the layers featured die-cast metal sections for increased weight, which resulted harder hits as beys battle. They also continued to implement gimmicks like the God System, though Cho-Z beys that were released early on did not feature them. Most layers had 3 slots that cause the bey to be unbalanced, which could be fixed with the use of a level chip that fits under the layer into said slots, though it was also harder to obtain early on due to only being available through special releases or events.
There was also subsection of layers that featured the "Cho-Z Awakening System" where if the bey is launched hard enough, protrusions called the "Cho-Z Wings" will extend outward, also releasing a set of points inside the bey that prevent it from unlocking to the point of bursting, referred to as "Burst Stoppers." These layers were incompatible with level chips as the bottom of the layer was covered to hold the components of the awakening system.
The discs were still generally numbered and compatible with frames, and there were also new frames and discs developed that worked with ones from the previous systems. The drivers also continued to develop, and "Dash Drivers" (marked by an apostrophe, such as Destroy') came into play. These drivers were generally releases of older drivers with a stronger spring to add to burst resistance, and were marked with a red ring on top instead of the normal white one.
Hasbro's release of Cho-Z, the Slingshock system, diverges the most from its Japanese counterpart in comparison to its take on the other systems. First, there was a lack of metal used in most of the layer releases, as the metal (and rubber in some cases), was replaced with plastic, making it less impactful compared to Cho-Z line and also came at the cost of the main gimmicks of some beys.
Secondly there was more of a focus on designing the beys to be specifically used with Slingshock Beystadiums, which featured rails a bey could ride along for a direct attack on opponents in the center of the main battle area. This was done by giving the drivers the ability to switch into "Slingshock Mode" which was essentially a flat tip designed for aggression for more chances to ride the rails. Some beys did come in the Switchstike line where they kept their original gimmicks, but these still mainly used plastic which lowered the effectiveness compared to Takara Tomy products.
GT Layer System
 |
| Slash Valkyrie Blitz Power Retsu |
The GT Chip: Has teeth used to lock the bey together. Different chips have different teeth.
The Layer Weight: Another metal (or rubber in the case of Gen) part that adds more weight to the bey in addition to the disc.
The Layer Base: The main part of the layer that makes contact with the opponent's bey. Has tabs to hold the other layer parts together, and different layers also have different heights that the GT chip rests upon, affecting the tightness of the lock.
This drastically increases how much one can change up their bey as each part changes a various aspect of performance from burst resistance to weight distribution at a greater level.
Another subsystem has also been released, the "Mugen (Infinite) Lock System." This keeps the layer as a singular piece but now the bey can click infinitely without bursting through normal conditions. The only way to burst this kind of bey is by first getting it to rotate so that the center shows red and then hitting a tab that causes the final click to happen, resulting in a burst.
At this point previous discs and frames have been re-released, but GT has also released new discs that are named and designed similarly to those from the single and dual layer era with plastic mimicking the use of disk frames that can have various gimmicks, however they are more developed with increased weight and additional features to stand out among the other generations.
Drivers have continued to develop with new designs, as well as older drivers being made more relevant with Dash Versions. GT has also given us two electric drivers, Hybrid and Ignition' that change performance mid-battle depending on your launch power.
Hasbro's release of the GT system is labelled as Hypersphere. Like their Slingshock lineup, Hypersphere layers continue to use plastic as the main component with little to no metal, as the layer weights are fused with the base and are made of plastic painted to look like metal. The GT chips are still customizable, but with the use of slopes there isn't much of a change to performance.
The GT discs have also been used, but changed by removing the plastic sections leaving only the metal portion of the disc, reducing weight and adjusting performance in the process. This was done because of the hypersphere mechanic, which in similar fashion to slingshock, means that the system is designed to be used with a specific stadium, being the Hypersphere Stadium that has a deeper bowl design for the main play area with ridges that beys with more mobility can reach. The tips have also been changed to suit this with what I'd call a "weeble-esque" design that is rounded to suit the stadium.
Here are links for parts under each generation:
Single and Dual: https://beyblade.fandom.com/wiki/List_of_Burst_System_parts
God: https://beyblade.fandom.com/wiki/List_of_God_Layer_System_parts
Cho-Z: https://beyblade.fandom.com/wiki/List_of_Cho-Z_Layer_System_parts
GT: https://beyblade.fandom.com/wiki/List_of_Gatinko_Layer_System_parts
Sparking: https://beyblade.fandom.com/wiki/List_of_Superking_Layer_System_parts
Overall, the Burst line is very interesting to look at in comparison to older series because it's able to build off of what previous series have done, while also playing around its main mechanic and using it to go beyond what has been done in the past as well (I don't mean that the older series are worse by any means, but I do like Burst the most at the time of writing this).
They managed to expand upon what they started with to the point where it feels not just like each part is important to how a bey performs overall, but that each part you choose to customize actually changes how the bey will perform as well, and there's no one aspect that seems less significant than another. I've really enjoyed playing around with it and can't wait to see what they do with it next.
Drivers have continued to develop with new designs, as well as older drivers being made more relevant with Dash Versions. GT has also given us two electric drivers, Hybrid and Ignition' that change performance mid-battle depending on your launch power.
Hasbro's release of the GT system is labelled as Hypersphere. Like their Slingshock lineup, Hypersphere layers continue to use plastic as the main component with little to no metal, as the layer weights are fused with the base and are made of plastic painted to look like metal. The GT chips are still customizable, but with the use of slopes there isn't much of a change to performance.
The GT discs have also been used, but changed by removing the plastic sections leaving only the metal portion of the disc, reducing weight and adjusting performance in the process. This was done because of the hypersphere mechanic, which in similar fashion to slingshock, means that the system is designed to be used with a specific stadium, being the Hypersphere Stadium that has a deeper bowl design for the main play area with ridges that beys with more mobility can reach. The tips have also been changed to suit this with what I'd call a "weeble-esque" design that is rounded to suit the stadium.
Superking (Sparking) Layer System
 |
| Brave Valkyrie Evolution' 2A |
SuperKing, which can be read as Sparking, is the current system following GT in beyblade, breaking up the layer once again, but now in such a way that it includes the disc. The layer is now broken up into four parts:
Chip: Similar to the GT chip in that it has the main "face" of the beyblade. Different chips are weighted differently and occasionally have gimmicks like the inclusion of metal.
Chip Core: Small piece that attaches in the center of the chip. Provides slight differences in weight and and may have slopes at different heights which affect the tightness of the bey.
Ring: Main contact point of the bey similar to the layer base of GT and holds the other parts of the layer together.
Chassis: The main metallic portion of Sparking beys that also has teeth that the driver locks on to like those in previous layers and on the GT chip. There are two types of Chassis, single chassis which are lighter and can have a regular disc attached to complete the bey, and dual chassis which also take the role of the disc and thus don't need one when putting a bey together.
The inclusion of Chassis allows one to mix up their options a bit more, but is not as backwards compatible as other incarnations since all Sparking beys require a chassis to operate, and Chassis can't be attached to previous layer systems. However, discs and drivers from sparking work as normal and are generally interchangeable with all incarnations. The term sparking also refers to the new Sparking Launcher, a beylauncher with a stronger string with material that rubs against a guard inside of the launcher when pulled, generating cold sparks.
Single and Dual: https://beyblade.fandom.com/wiki/List_of_Burst_System_parts
God: https://beyblade.fandom.com/wiki/List_of_God_Layer_System_parts
Cho-Z: https://beyblade.fandom.com/wiki/List_of_Cho-Z_Layer_System_parts
GT: https://beyblade.fandom.com/wiki/List_of_Gatinko_Layer_System_parts
Sparking: https://beyblade.fandom.com/wiki/List_of_Superking_Layer_System_parts
Overall, the Burst line is very interesting to look at in comparison to older series because it's able to build off of what previous series have done, while also playing around its main mechanic and using it to go beyond what has been done in the past as well (I don't mean that the older series are worse by any means, but I do like Burst the most at the time of writing this).
They managed to expand upon what they started with to the point where it feels not just like each part is important to how a bey performs overall, but that each part you choose to customize actually changes how the bey will perform as well, and there's no one aspect that seems less significant than another. I've really enjoyed playing around with it and can't wait to see what they do with it next.